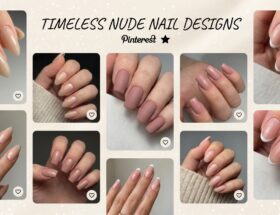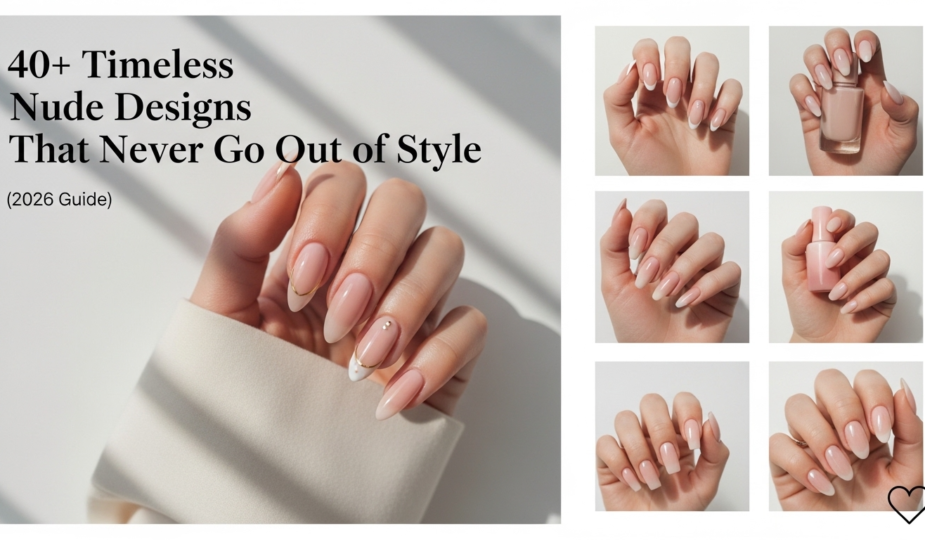
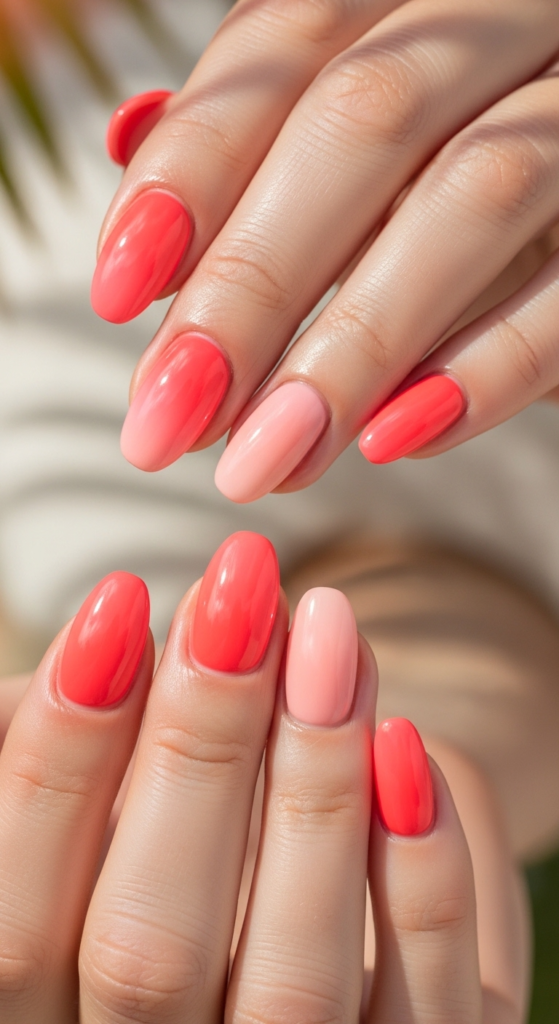
If there’s one nail trend that has stood the test of time and continues to dominate runways, red carpets, and Pinterest boards year after year, it’s nude nails. These understated, elegant manicures are the ultimate definition of “less is more,” offering a sophisticated look that works for absolutely any occasion, season, or outfit.
This comprehensive guide is perfect for anyone who loves classic beauty—whether you’re a busy professional looking for office-appropriate nails, a bride searching for the perfect wedding manicure, or a DIY nail enthusiast who appreciates timeless elegance. You’ll discover why nude nails remain eternally chic, learn how to find your perfect nude shade, and get step-by-step instructions for creating salon-quality nude manicures at home.
By the end of this article, you’ll have over 40 nude nail design ideas, pro techniques for making them last, and the confidence to create these versatile looks yourself. From minimalist glossy nudes to elevated designs with subtle embellishments, there’s a nude nail style here for everyone!
Why This Nail Trend is So Popular
Nude nails have been a fashion staple since the 1920s when women first began wearing natural-looking polish to appear refined and polished. The trend gained massive popularity in the 1990s thanks to supermodels and continues to be reinvented with modern twists today.
On Pinterest, “nude nail designs” receives over 5 million searches annually, with interest peaking during wedding season and professional events. Instagram hashtags like #NudeNails and #NeutralNails have collectively amassed over 15 million posts, proving this trend’s staying power.
Celebrities and influencers consistently choose nude manicures for their versatility. Meghan Markle famously wore nude nails throughout her time as a royal (royal protocol encourages neutral polish!), while style icons like Jennifer Aniston, Hailey Bieber, and Zendaya regularly sport various nude shades on red carpets. Beauty influencers on TikTok have also sparked a “nude nail renaissance,” showing how these classic colors can be modernized with creative designs, textures, and finishes.
The beauty of nude nails lies in their universality—there’s a perfect nude shade for every skin tone, and the design possibilities are truly endless while maintaining that timeless, sophisticated aesthetic.
Why You’ll Love Timeless Nude Nail Designs
Nude nails are the Swiss Army knife of manicures—practical, versatile, and always appropriate. They’re the perfect choice when you want your nails to look polished and intentional without drawing too much attention.
Here’s why nude nail designs deserve a permanent spot in your manicure rotation:
- Universally flattering: There’s a nude shade that complements every skin tone, from fair to deep
- Ultimate versatility: Goes with literally any outfit, from casual jeans to formal gowns
- Office-approved: Perfect for professional settings and conservative dress codes
- Low maintenance: Chips and growth are far less noticeable than with bold colors
- Timeless elegance: Never looks dated or trendy in a bad way—always sophisticated
- Easy to execute: Even beginners can achieve beautiful results with nude polish
- Budget-friendly: Simple nude manicures require minimal products and tools
- Perfect canvas: Provides a beautiful base for subtle nail art and embellishments
- Complements jewelry: Won’t clash with your rings, bracelets, or watch
- Quick touch-ups: Easy to fix minor chips without redoing your entire manicure
oloring!
Step-by-Step Tutorial: Classic Glossy Nude Manicure
Let me walk you through creating the perfect timeless nude manicure that looks expensive and professional. This is the foundation technique you’ll use for all nude nail variations!
Step 1: Find Your Perfect Nude Shade (Before You Start) This is crucial! The right nude shade should be 1-2 shades lighter or slightly more saturated than your natural nail bed. For fair skin, look for peachy or pink-toned nudes. For medium skin, try beige or warm taupe nudes. For deep skin, opt for rich caramel, cocoa, or mauve nudes. When in doubt, bring your hand to the store to compare!
Step 2: Prep Your Nails (10 minutes) Start with clean, polish-free nails. Wash your hands thoroughly with soap to remove any oils or lotions. Soak fingertips in warm water for 2-3 minutes to soften cuticles. Gently push back cuticles using a cuticle pusher—push, don’t scrape. Carefully trim any excess cuticle skin with nippers (only remove hanging skin, never cut healthy cuticle). This step is critical for nude nails because any cuticle buildup is highly visible against nude polish!
Step 3: Shape Your Nails (5 minutes) File nails to your preferred shape. For the most timeless look, I recommend a rounded square (squoval) or classic oval shape—both are elegant and practical. File in one direction only to prevent splitting. For nude nails, keep length moderate (no more than 3-4mm of free edge) for the most sophisticated look. Buff the nail surface very lightly to smooth any ridges, but don’t over-buff as this weakens nails.
Step 4: Dehydrate and Cleanse (2 minutes) This step makes a huge difference in longevity! Wipe each nail with rubbing alcohol or nail dehydrator using a lint-free pad. This removes any remaining oils that could cause lifting or chipping. Wait 30 seconds for complete evaporation before moving to the next step.
Beginner Tip: If you’re struggling with streaky nude polish, try these tricks: (1) Make sure your base coat is completely dry, (2) Use very thin coats and build up coverage gradually, (3) Don’t go back over polish once it starts to set—this creates streaks, (4) Invest in a high-quality nude formula (OPI and Essie have excellent opacity).
Design Variations & Ideas
The beauty of nude nails is that they’re a perfect canvas for endless variations! Here are five stunning ways to elevate the classic nude manicure:
1. Nude French Manicure with White Tips The most iconic nude variation! Apply your nude base (2 coats), then create clean white tips using a striping brush or French manicure stickers. For a modern twist, try almond-shaped nails with a thin white tip. This design is wedding-perfect and ultra-elegant. Difficulty: Intermediate
2. Glossy & Matte Nude Combo Paint all nails in your favorite nude, then apply matte top coat to just your ring finger and thumb (or any accent nails you prefer). The texture contrast is sophisticated and modern. You can also reverse it—matte on all nails with glossy accents! Difficulty: Easy
3. Nude Nails with Gold Foil Accents Apply nude polish as your base, then add small pieces of gold leaf or foil to one or two accent nails while the polish is still slightly tacky. Seal with top coat. This adds just a hint of luxury without being over-the-top. Perfect for special occasions! Difficulty: Intermediate
4. Minimalist Nude with Single Rhinestone Keep it ultra-simple and chic with all nude nails, then add just one small clear or nude rhinestone to the base of your ring finger nail. Less is more! This is office-appropriate yet special. Difficulty: Easy
5. Nude Ombre Gradient Blend two nude shades—one lighter, one deeper—to create a subtle ombre effect using a makeup sponge. This adds dimension while maintaining the nude aesthetic. Try champagne to deep nude, or peachy nude to mauve nude. Difficulty: Advanced
Pro Nail Tech Tips
Want your nude nails to look professionally done? Here are insider secrets that nail technicians use:
For Perfect Nude Opacity: The key to streak-free nude polish is patience and thin layers. Many people try to build full coverage in one thick coat, which always results in streaking. Instead, apply 3 thin coats if needed. Between coats, let each layer dry until it’s no longer tacky to the touch (5-7 minutes minimum). Also, store your nude polish upside down so pigments stay mixed—shake (don’t roll!) before each use.
For Professional-Looking Cuticles: Nude nails make imperfect cuticles obvious, so cuticle care is critical. After applying cuticle oil, use a clean nail brush to gently brush cuticles in a downward motion—this smooths them and removes any dry skin. For the most polished look, apply a tiny amount of foundation or concealer to cuticles after your manicure (yes, really!). This creates that salon-perfect, uniform look.
For Longer-Lasting Wear: Always use a good base coat—it’s non-negotiable for nude nails. Dehydrate nails with alcohol before applying base coat to ensure maximum adhesion. Cap the free edge with every single layer (base, color coats, top coat). This seals the tip where chipping typically starts. Reapply top coat every 2-3 days to refresh shine and prevent chipping.
For Finding Your Perfect Nude: Hold nude polish bottles against your wrist (not your palm, which is darker) in natural lighting. The right nude should almost disappear into your skin while being just slightly more pigmented. If you see a stark contrast, the shade isn’t right for you. Generally, fair skin looks best in pink or peachy nudes, medium skin in warm beige or caramel nudes, and deep skin in rich cocoa or mauve nudes.
For Glass-Like Shine: Apply top coat when your color is completely dry, but here’s the secret: do two passes. First, apply a thin even layer. Then, go back with a second, slightly thicker layer, really flooding the nail with top coat. This creates that expensive-looking, glass-like depth. Using a quick-dry top coat like Seche Vite also creates superior shine compared to regular top coat.
For Preventing Bubbles: Bubbles are especially noticeable in nude polish! Never shake your polish bottle—roll it between your palms instead. Apply polish in a cool room (warm temperatures cause bubbles). Use thin coats—thick polish traps air. Don’t apply polish over freshly moisturized hands (the oils cause bubbles). If you do get a bubble, don’t try to fix it—let it dry, gently buff it away, then reapply a thin layer of color and top coat.
Common Mistakes to Avoid
Even experienced nail enthusiasts make these errors with nude manicures! Here’s what to watch out for:
1. Choosing the Wrong Nude Shade This is the biggest mistake! A nude that doesn’t complement your skin tone will look chalky, yellow, or washed out instead of elegant. The wrong nude can make your hands look sickly rather than sophisticated. Solution: Always test nude polish on your actual nails in natural daylight before purchasing. What looks perfect in the bottle might not suit your skin tone. Don’t be afraid to try multiple shades until you find “the one.”
2. Applying Thick Coats to Build Coverage Faster Thick coats of nude polish create streaks, take forever to dry, and chip faster. They also tend to look goopy rather than elegant. Solution: Embrace the process! Apply 2-3 thin coats, waiting 5-7 minutes between each layer. Thin coats actually dry faster overall and create a smoother, more professional finish. Your patience will be rewarded!
3. Neglecting Cuticle Care Ragged, pushed-up cuticles are highly visible against nude polish and ruin the sophisticated look you’re going for. Dry skin around nails also stands out more with nude colors. Solution: Make cuticle care a priority! Push back cuticles gently, trim only excess skin, and apply cuticle oil daily (yes, even after your manicure is complete). Well-maintained cuticles are the secret to expensive-looking nude nails.
4. Skipping the Base Coat Some people skip base coat with nude polish thinking it’s “close to natural anyway,” but this is a huge mistake. Without base coat, nude polish can stain your nails yellow (especially if you have thin or porous nails), and your manicure will chip much faster. Solution: Always, always use base coat! It protects your natural nails, prevents staining, smooths the surface for even application, and dramatically extends wear time. Consider it mandatory, not optional.
5. Not Capping the Free Edge Failing to seal the tip of your nail is the #1 cause of premature chipping, especially at the tips where nails take the most abuse. Many people carefully paint the nail surface but forget the actual edge. Solution: With every single layer—base coat, each color coat, and top coat—swipe your brush across the very tip of the nail to “cap” it. This creates a seal that prevents water and debris from getting under the polish and causing chips.
How Long Will It Last?
Nude nails can actually last longer than bold colors because chips and growth are less noticeable, making your manicure look fresh even as it ages.
Regular Nude Polish: With proper application (base coat, capping edges, top coat), expect 5-7 days of great-looking wear. You may see minor tip wear after 5 days, but with nude shades, it blends in rather than standing out. Many people can stretch a nude manicure to 10 days by touching up the tips and reapplying top coat.
Gel Nude Polish: Gel manicures in nude shades typically last 12-14 days with minimal visible wear. Some people can go 3 weeks, though growth will be noticeable by then. Gel is ideal for special events like weddings or vacations when you want your nails to look perfect for an extended period.
Tips to Maximize Longevity:
- Wear gloves when washing dishes, cleaning, or gardening—water exposure is polish’s enemy
- Reapply top coat every 2-3 days to refresh shine and seal any micro-chips before they become visible
- Apply cuticle oil daily, especially before bed—this keeps nails flexible and prevents brittleness that causes chipping
- Avoid using your nails as tools (opening cans, peeling stickers, scratching off labels)
- Keep nails at a practical length—super long nails are prone to breaking and chipping regardless of polish type
- Apply a thin layer of top coat to just the tips every other day for extra protection where wear happens most
Touch-Up Strategy: When you notice minor tip wear (usually around day 5-6), here’s how to extend your manicure: Lightly file any rough edges or chips smooth. Apply a thin coat of your nude polish just to the affected nail(s). Once dry, apply top coat to all nails for uniformity. This simple touch-up can add 3-4 more days to your manicure!
Removal & Aftercare
Nude polish is easy to remove, but proper technique protects your natural nails for future manicures.
For Regular Nude Polish: Soak a cotton pad in acetone-based nail polish remover (acetone works faster and is actually less damaging when used briefly than prolonged soaking with non-acetone removers). Press the soaked pad onto your nail and hold for 10-15 seconds to allow the remover to break down the polish. Then wipe firmly from cuticle to tip in one motion. Nude polish usually comes off very easily. For stubborn spots, use a gentle rubbing motion rather than aggressive scraping.
For Gel Nude Polish: File off the shiny gel top coat layer with a 180-grit file to break the seal—this step is essential. Soak cotton pads in pure acetone (not regular remover, which won’t work on gel). Place a soaked pad on each nail and wrap each finger in aluminum foil to create a seal. Wait 12-15 minutes. Remove foil and gently push off softened gel with an orange stick or cuticle pusher. Never force or peel gel off—this removes layers of your natural nail! If gel doesn’t slide off easily, re-wrap and soak for another 5 minutes.
Immediate Post-Removal Care: After removing any polish, your nails will be slightly dehydrated. Immediately wash your hands with gentle, moisturizing soap to remove all remover residue. Apply a rich hand cream, massaging it into nails and cuticles. I love using a dedicated cuticle oil or pure jojoba oil—apply generously to all nails and massage for 1-2 minutes. This replenishes moisture lost during removal.
Recovery Period: Give your nails a 1-2 day “naked” break between manicures, especially if you’ve been wearing polish continuously. During this time, apply a nail strengthening treatment like OPI Nail Envy, Nailtiques Formula 2, or CND RescueRXx. Apply cuticle oil 2-3 times daily. Buff nails gently to smooth the surface. This recovery period keeps nails healthy and strong.
Recommended Nail Recovery Products:
- OPI Nail Envy Original – The gold standard for strengthening weak nails ($18)
- Burt’s Bees Lemon Butter Cuticle Cream – Intense moisture without greasiness ($6)
- Sally Hansen Vitamin E Nail & Cuticle Oil – Affordable and effective ($5)
- CND SolarOil – Professional cuticle oil used in salons ($10)
- Essie Treat Love & Color – Breathable polish alternative with strengthening benefits ($9)
Best Occasions to Wear This Design
The brilliance of nude nails is their unmatched versatility. Here’s when they truly shine:
Weddings (Bride or Guest): Nude nails are the most popular choice for brides because they’re timeless in photos, complement any dress style, and won’t distract from your ring. For guests, nude manicures work with any outfit and are always appropriate. Try a classic nude French manicure for traditional weddings or nude with subtle gold foil for modern celebrations.
Professional & Office Settings: Nude nails are perfect for conservative workplaces, job interviews, or professional presentations. They look polished and intentional without being distracting or inappropriate. Even in the strictest dress code environments, sophisticated nude nails are always acceptable. This is especially valuable for careers in law, finance, healthcare, or corporate settings.
Everyday Wear: Nude nails are ideal for busy people who don’t want to worry about polish clashing with outfits. They work with absolutely everything in your closet—from athleisure to evening wear. The low-maintenance aspect (chips are barely visible) makes them perfect for everyday life.
Job Interviews: When you want to look groomed and professional without drawing attention, nude nails are your best bet. They show you pay attention to details without making a statement. Stick with classic glossy nude or a subtle French manicure for interviews.
Formal Events & Red Carpet: Many celebrities choose nude manicures for award shows and galas because they’re sophisticated and don’t compete with statement jewelry or gowns. Nude nails let your outfit and accessories be the star while ensuring your hands look impeccable in photos.
Travel: Nude manicures are perfect for vacations because they require minimal touch-ups, work with every outfit you packed, and look fresh even with minor wear. Get a gel nude manicure before a two-week trip and forget about your nails entirely!
When You Want to Show Off Jewelry: Nude nails are the perfect backdrop for beautiful rings, bracelets, and watches. Unlike bold colors that can clash, nude shades complement any metal (gold, silver, rose gold) and any gemstone. This is why engagement photos often feature nude manicures—the focus stays on the ring!
Minimalist Style Lovers: If your personal aesthetic is clean, minimal, and refined, nude nails align perfectly with this philosophy. They’re the nail equivalent of a perfect white t-shirt—simple, classic, and endlessly chic.
Product Recommendations
Ready to create your perfect nude manicure? Here are my tried-and-true product recommendations:
Best Nude Nail Polishes:
- OPI “Samoan Sand” – A universally flattering warm nude that works beautifully on medium to deep skin tones. Excellent opacity in 2 coats. Available at Ulta, Sally Beauty, and Amazon for $11.
- Essie “Ballet Slippers” – The iconic pink-toned nude that’s been beloved since the 1980s. Perfect for fair to light-medium skin. Tends to be sheer, so plan for 3 coats. Found at drugstores, Target, and Ulta for $9.
- OPI “Bubble Bath” – A soft, sheer peachy-pink nude that creates a “your nails but better” effect. Buildable formula that’s forgiving for beginners. Available everywhere OPI is sold for $11.
- Essie “Marshmallow” – A clean, milky nude without pink or yellow undertones. Fantastic for creating modern French manicures. Drugstores and Ulta, $9.
- OPI Infinite Shine “Maintaining My Sand-ity” – A long-wear formula (up to 11 days) in a gorgeous neutral nude. Slightly more pigmented than traditional nudes for easier application. $13 at Ulta or Sally Beauty.
- Zoya “Kendal” – A sophisticated taupe-nude that’s particularly stunning on medium to deep skin tones. This 5-free formula is healthier for nails. $10 on Zoya.com or Amazon.
- Sally Hansen Complete Salon Manicure “Barely Nude” – Best budget option at $7-8! Decent opacity and includes a built-in base and top coat for quick application. Available at drugstores.
Best Top Coats for Glass-Like Shine:
- Seche Vite Dry Fast Top Coat – The professional standard. Creates incredible gloss and dries in 2-3 minutes. Can get thick over time, so add Seche Restore thinner as needed. $10 at Sally Beauty.
- Essie Gel Couture Top Coat – Provides gel-like shine without a lamp. Works beautifully with Essie Gel Couture polishes but also works with regular polish. $12 at drugstores.
- OPI Top Coat – Reliable shine and protection. Not as fast-drying as Seche Vite but more affordable. $11 at Ulta and Sally Beauty.
Best Base Coats:
- OPI Natural Nail Base Coat – Provides a smooth surface and prevents staining. $11 at Ulta.
- Essie First Base Base Coat – Great for smoothing ridges and improving polish adhesion. $9 at drugstores.
Affordable Alternatives:
- LA Girl Pro Matte Base Coat – Only $4 at beauty supply stores! Surprisingly good quality for smoothing nails.
- Wet n Wild Wild Shine Clear Nail Protector – Budget base or top coat for under $2. Good for practicing techniques before investing in premium products.
Where to Buy:
Shop these products at Ulta Beauty (great rewards program!), Sally Beauty Supply, Target, CVS, Walgreens, or Amazon. Sign up for store emails to catch sales—Ulta frequently runs “buy 2 get 1 free” on nail products, and Sally Beauty has a pro membership ($10/year) that saves you 25% on everything.
Inspiration Gallery Ideas
Here are seven gorgeous nude nail design ideas to try, each with a unique personality:
1. Classic Nude French Manicure The gold standard of timeless nails! Apply a soft pink or beige nude base (2-3 coats), then create clean white tips using either a striping brush or French manicure guides. Keep tips thin and precise for the most elegant look. Color Palette: Soft pink nude + bright white. Difficulty: Intermediate. Perfect for: Weddings, formal events
2. Nude Almond Nails with Single Gold Stripe Shape nails into elegant almond points, apply a neutral beige nude (2 coats), then add one thin vertical gold stripe down the center of each ring finger nail using a striping brush or gold striping tape. Modern and chic! Color Palette: Warm beige nude + metallic gold. Difficulty: Intermediate. Perfect for: Date nights, parties
3. Sheer Nude with Cuticle Rhinestones Apply a sheer milky nude polish (3 thin coats for subtle coverage), then place 3-5 tiny clear rhinestones in a curved line near the cuticle of each ring finger and thumb. Delicate and feminine! Color Palette: Milky nude + clear crystals. Difficulty: Easy. Perfect for: Everyday elegance
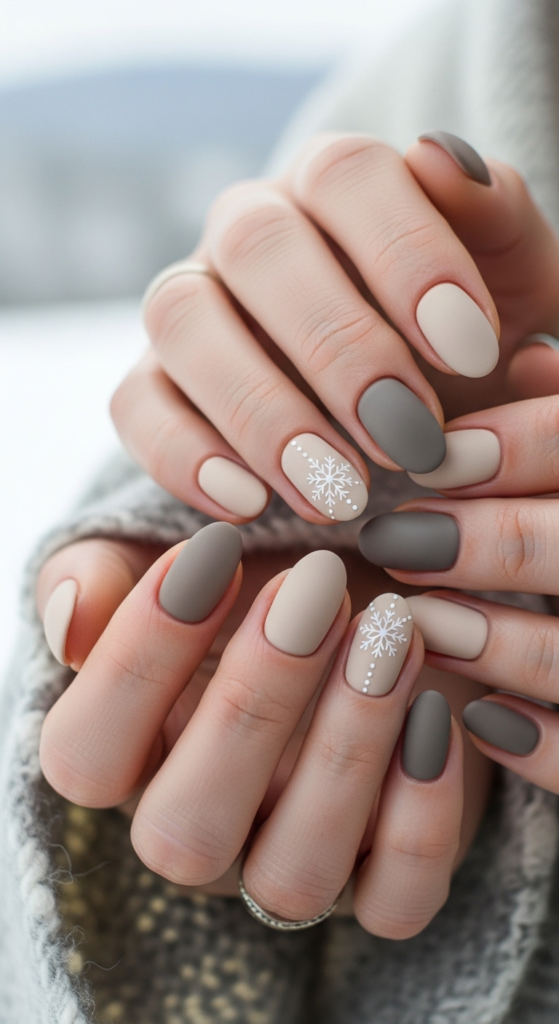
4. Matte Nude Minimalist Nails Paint all nails in a rich caramel or cocoa nude (perfect for medium to deep skin tones), seal with regular glossy top coat, then apply matte top coat over it. The result is a velvety, sophisticated finish. Color Palette: Caramel or cocoa nude. Difficulty: Easy. Perfect for: Modern minimalists, fall/winter
5. Nude Ombre French Tips Create a gradient French manicure by ombré-ing from your nude base color into white at the tips using a makeup sponge. This softens the traditional French manicure for a more modern look. Color Palette: Peachy nude fading to white. Difficulty: Advanced. Perfect for: Weddings, photo shoots
6. Nude Nails with Geometric Negative Space Apply nude polish, then use striping tape to create geometric patterns (triangles, lines, diagonal blocks) on accent nails. Remove tape to reveal negative space showing your natural nail. Seal with top coat. Color Palette: Beige nude + natural nail. Difficulty: Intermediate. Perfect for: Creative professionals, art lovers
7. Glossy Nude with Pearl Accents Paint nails in a champagne nude with subtle shimmer, then add one small pearl stud to the base of your ring finger nail. Ultra-luxe and perfect for special occasions! Color Palette: Champagne nude + white pearl. Difficulty: Easy. Perfect for: Anniversaries, elegant dinners